

I learned to sew from my grandmother. I remember watching as she took some fabric, a needle, and a bit of thread and turned it into something new. To me, it was a little like magic.
The Catalina Incognito series was inspired when I wondered, “What if it really was magic?”
In celebration of the books, here’s a beginner’s project to sew up some magic of your own! You can choose to make either a cat-shaped pencil pouch or a cat plush.
First, gather your supplies.
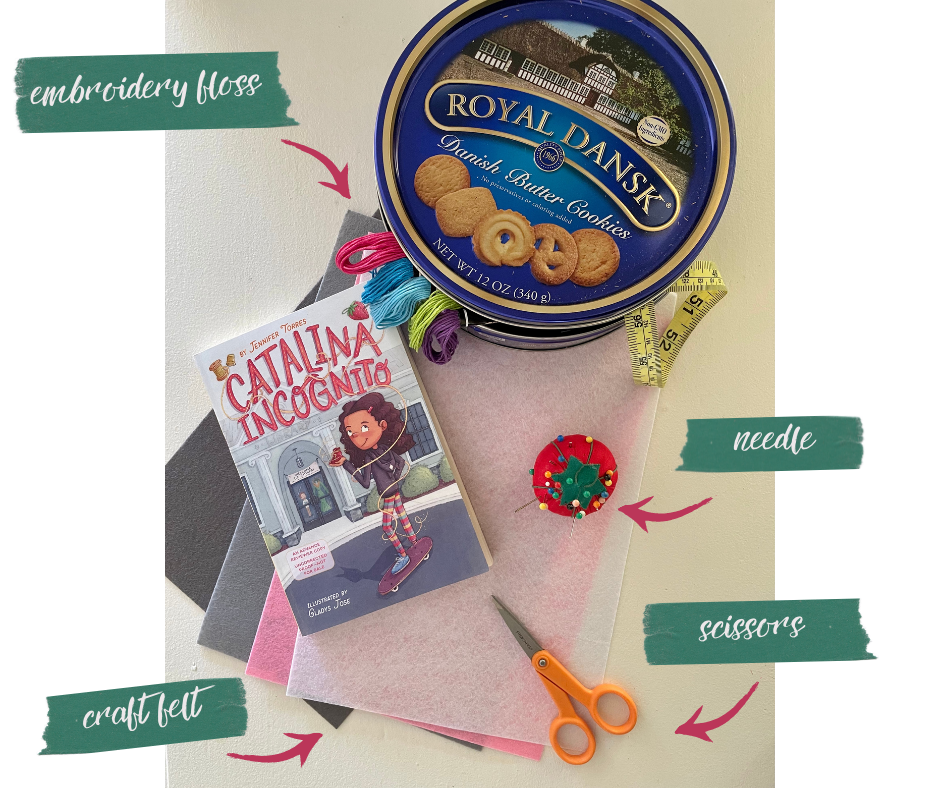
You’ll need:
- Printable cat template
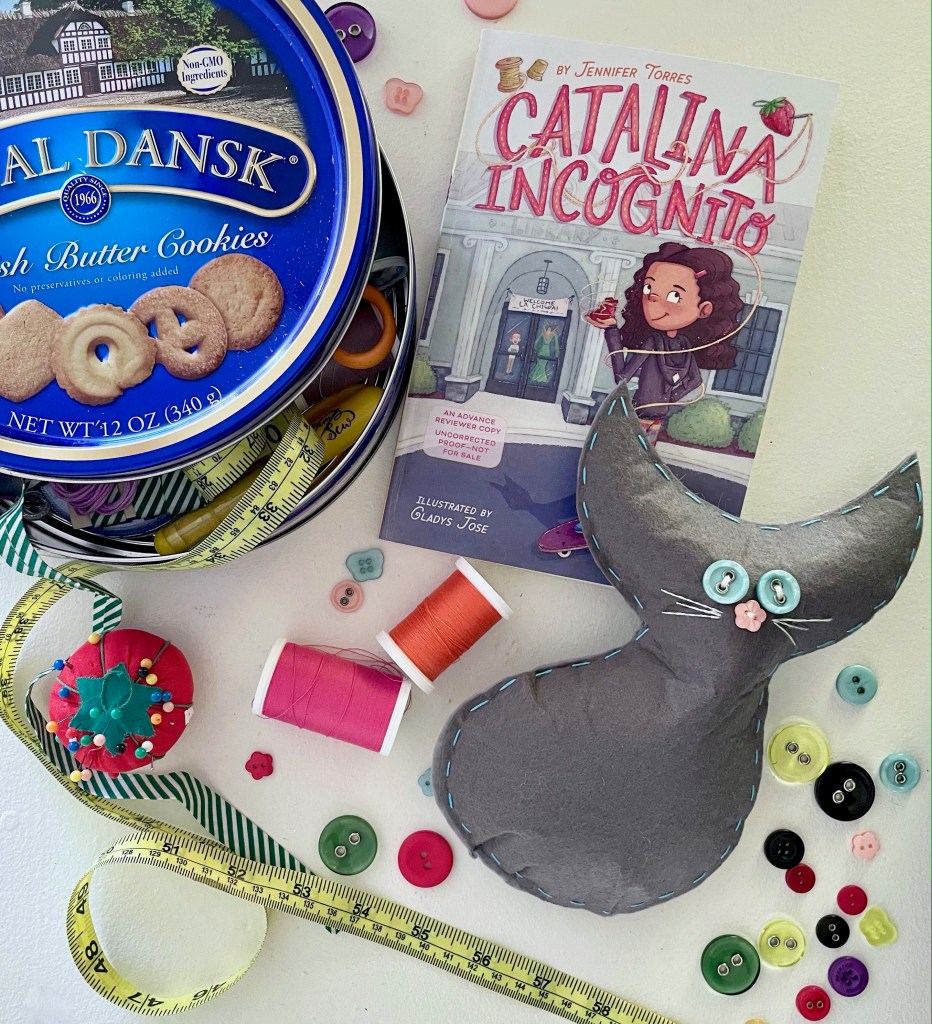
- Embroidery floss (Each thread is usually made up of six thinner strands. For this project, I teased out two strands to sew with).
- Craft felt (Felt is great for beginners because it doesn’t fray and doesn’t slip!)
- A needle
- Scissors
- Optional: Buttons for decorating and poly-fil stuffing
Running Stitch
This project uses the running stitch. It’s a pretty simple and useful, over-under-over-under stitch that just happens to be the first one Catalina learns in the book series! Don’t know how? Don’t worry!
First, snip off some embroidery floss (Around the length of your arm should be enough!), thread your needle, and tie a knot at the end.
Pull the needle up through the felt, back to front.
Now, move the needle forward about a quarter inch and push it down through the felt, this time front to back. Move the needle another quarter inch forward and repeat, back to front.
That’s it! continue until your seam is complete.

Try out different lengths! Short stitches are usually stronger. But long stitches can be quicker to sew and are useful when the seam is temporary.

Now, let’s sew!
First, print and cut out the cat template, then trace the pieces onto your felt. You’ll need two body pieces and one tail piece.
Next, place the tail piece on one of the body pieces. This will be the back of your cat. Attach the tail using the running stitch.(Already so cute!)

If you want to embellish your cat’s face, now’s the time! Add details to the front piece (I used buttons and extra thread). Important: Before you do anything permanent, make sure the front and back pieces line up correctly!

Almost there!
Now, place the front piece on top of the bottom piece, wrong sides together (right sides facing out). Using the running stitch, sew from the tip of one ear, around the body, to the tip of the other ear. Leave an opening across the top of the head. (If you’re not a beginner, you can try out more complex stitches for this. I think a blanket stitch always looks charming on felt toys).
If you stop here and tie a knot at the end of your thread, you’ll have an amazing pencil pouch!
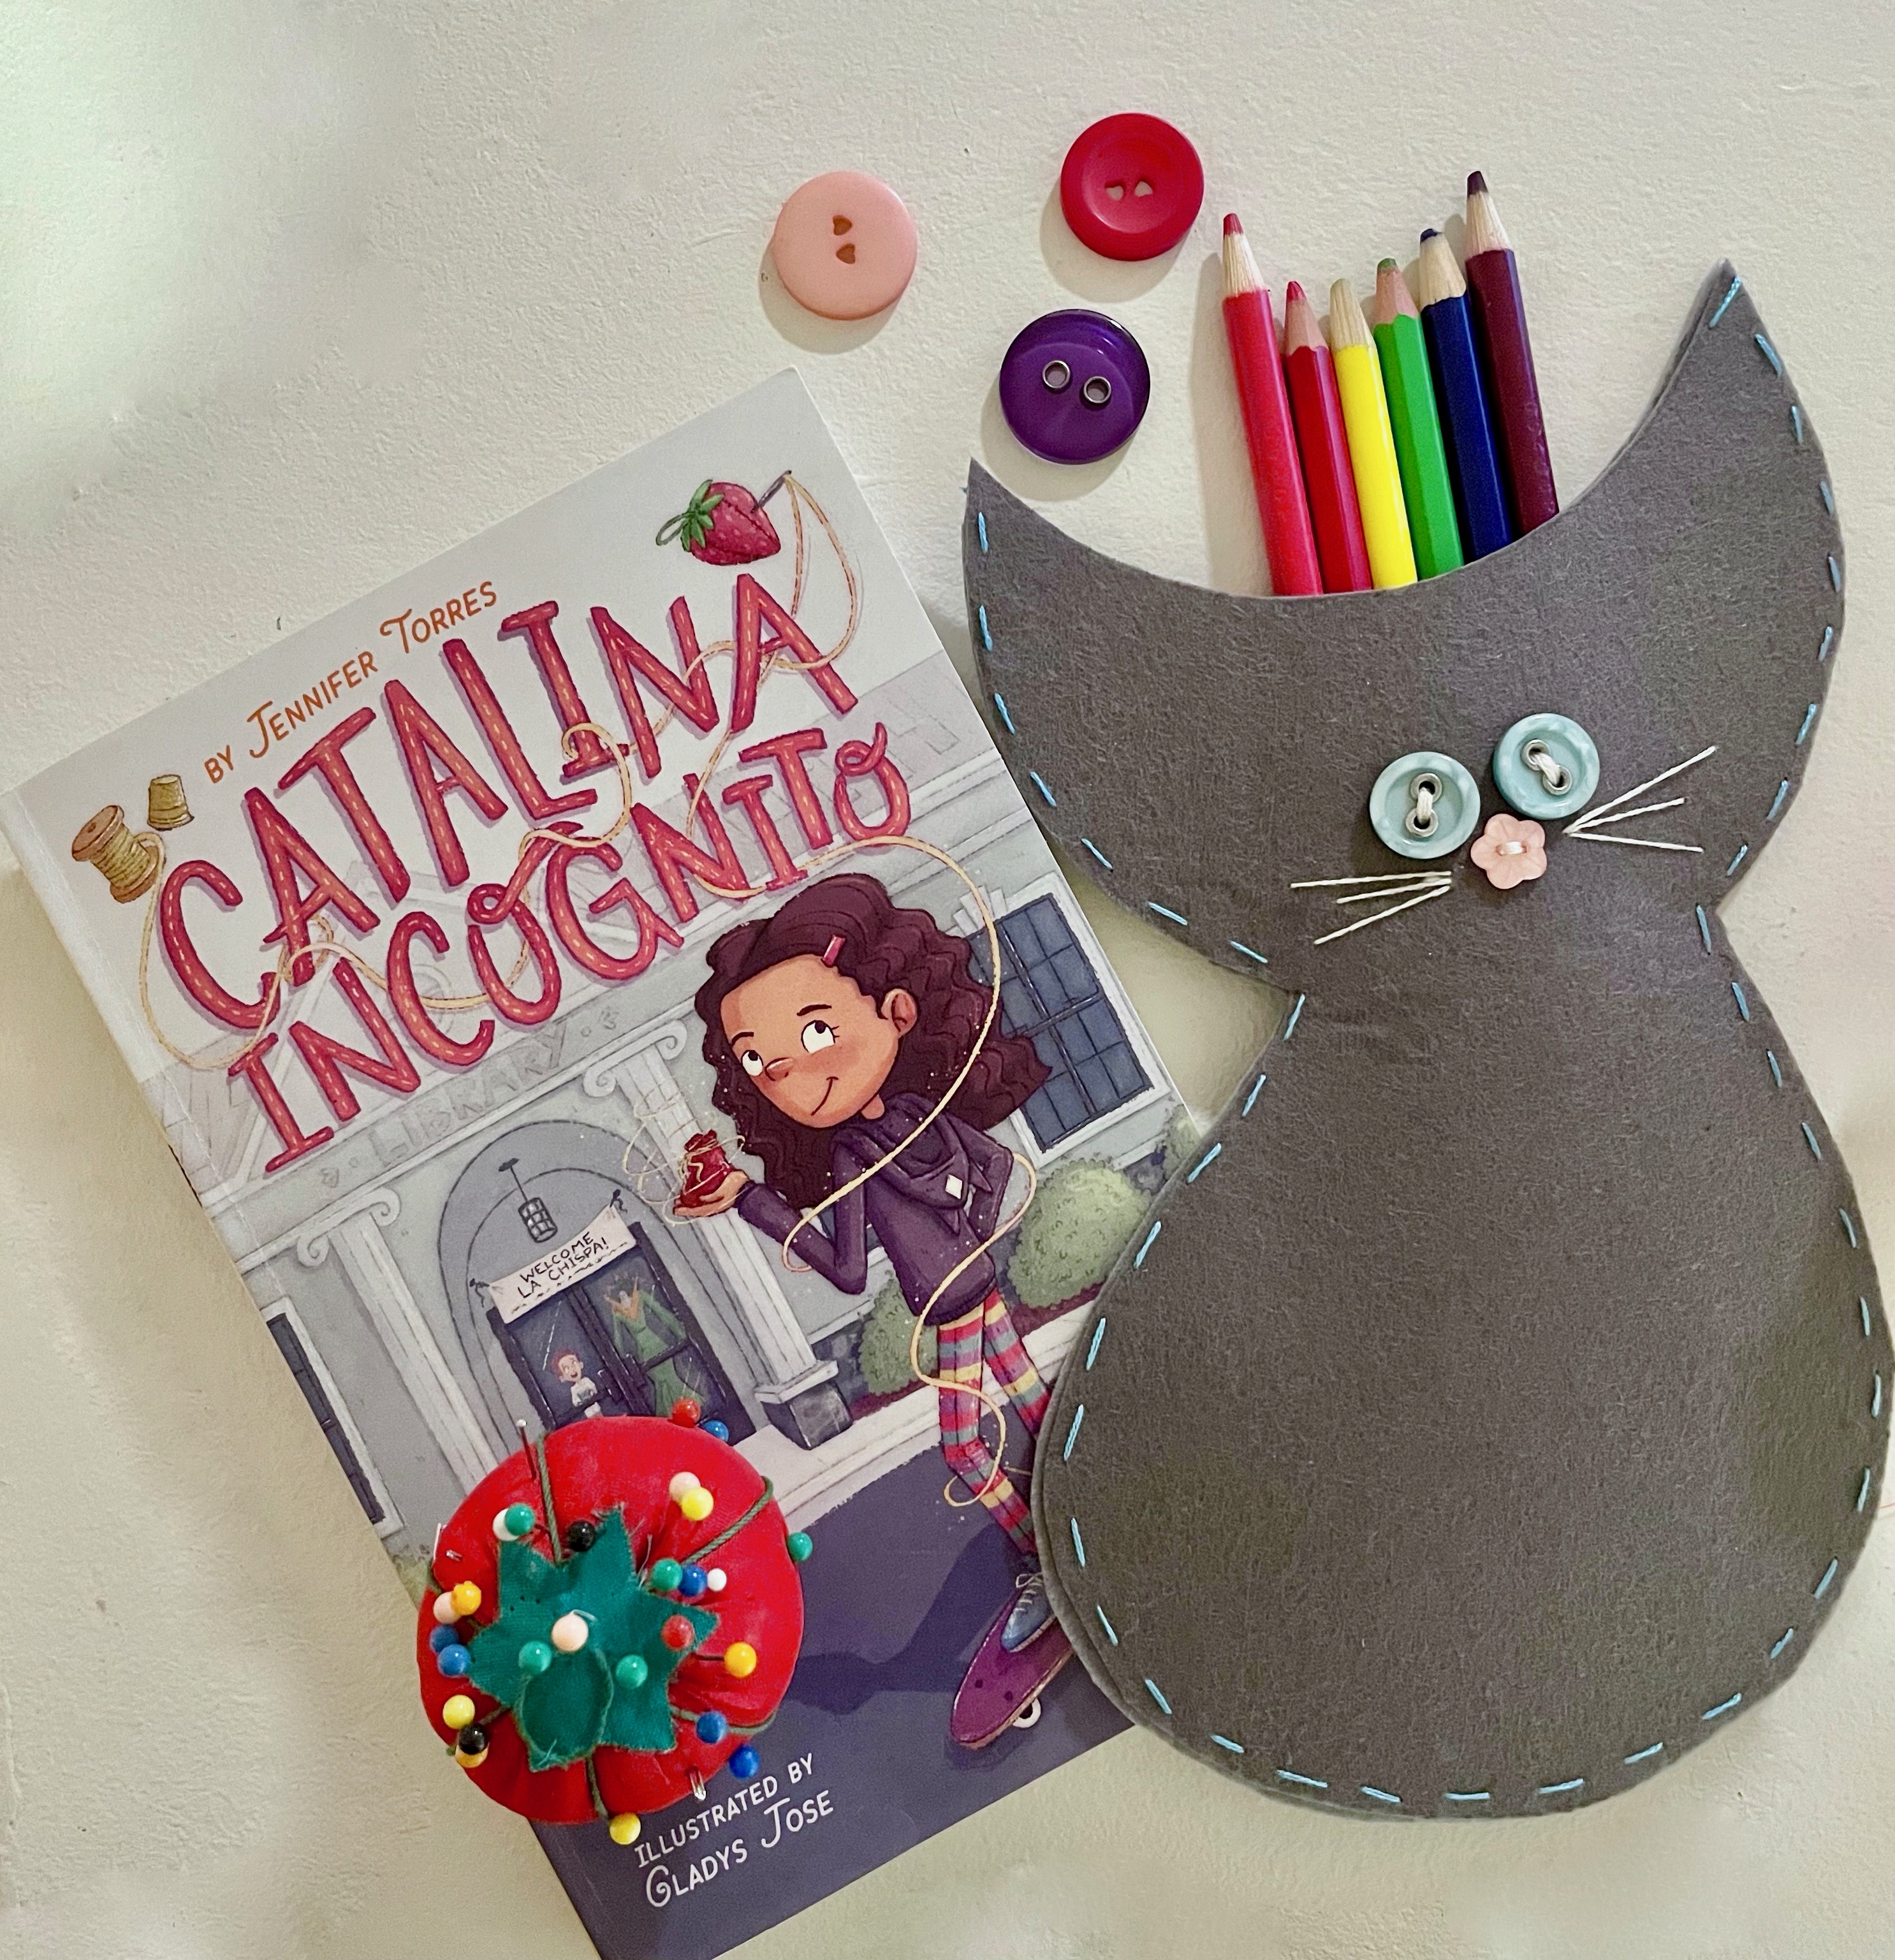
Alternatively, to make a plush, leave the thread hanging while you stuff the doll with poly-fil. When you’re finished, sew up the top, tie it off, and snip the excess thread.


Doesn’t it feel great to make something? Send me a picture if you sew this up!
